You cannot delete a user, but you can make them inactive.
- Navigate to Aero Settings > Team Members.
- On the Setup Team Members screen, click the View button on the Team Member you want to edit.
- When you're done creating your new user, click Save & Close.
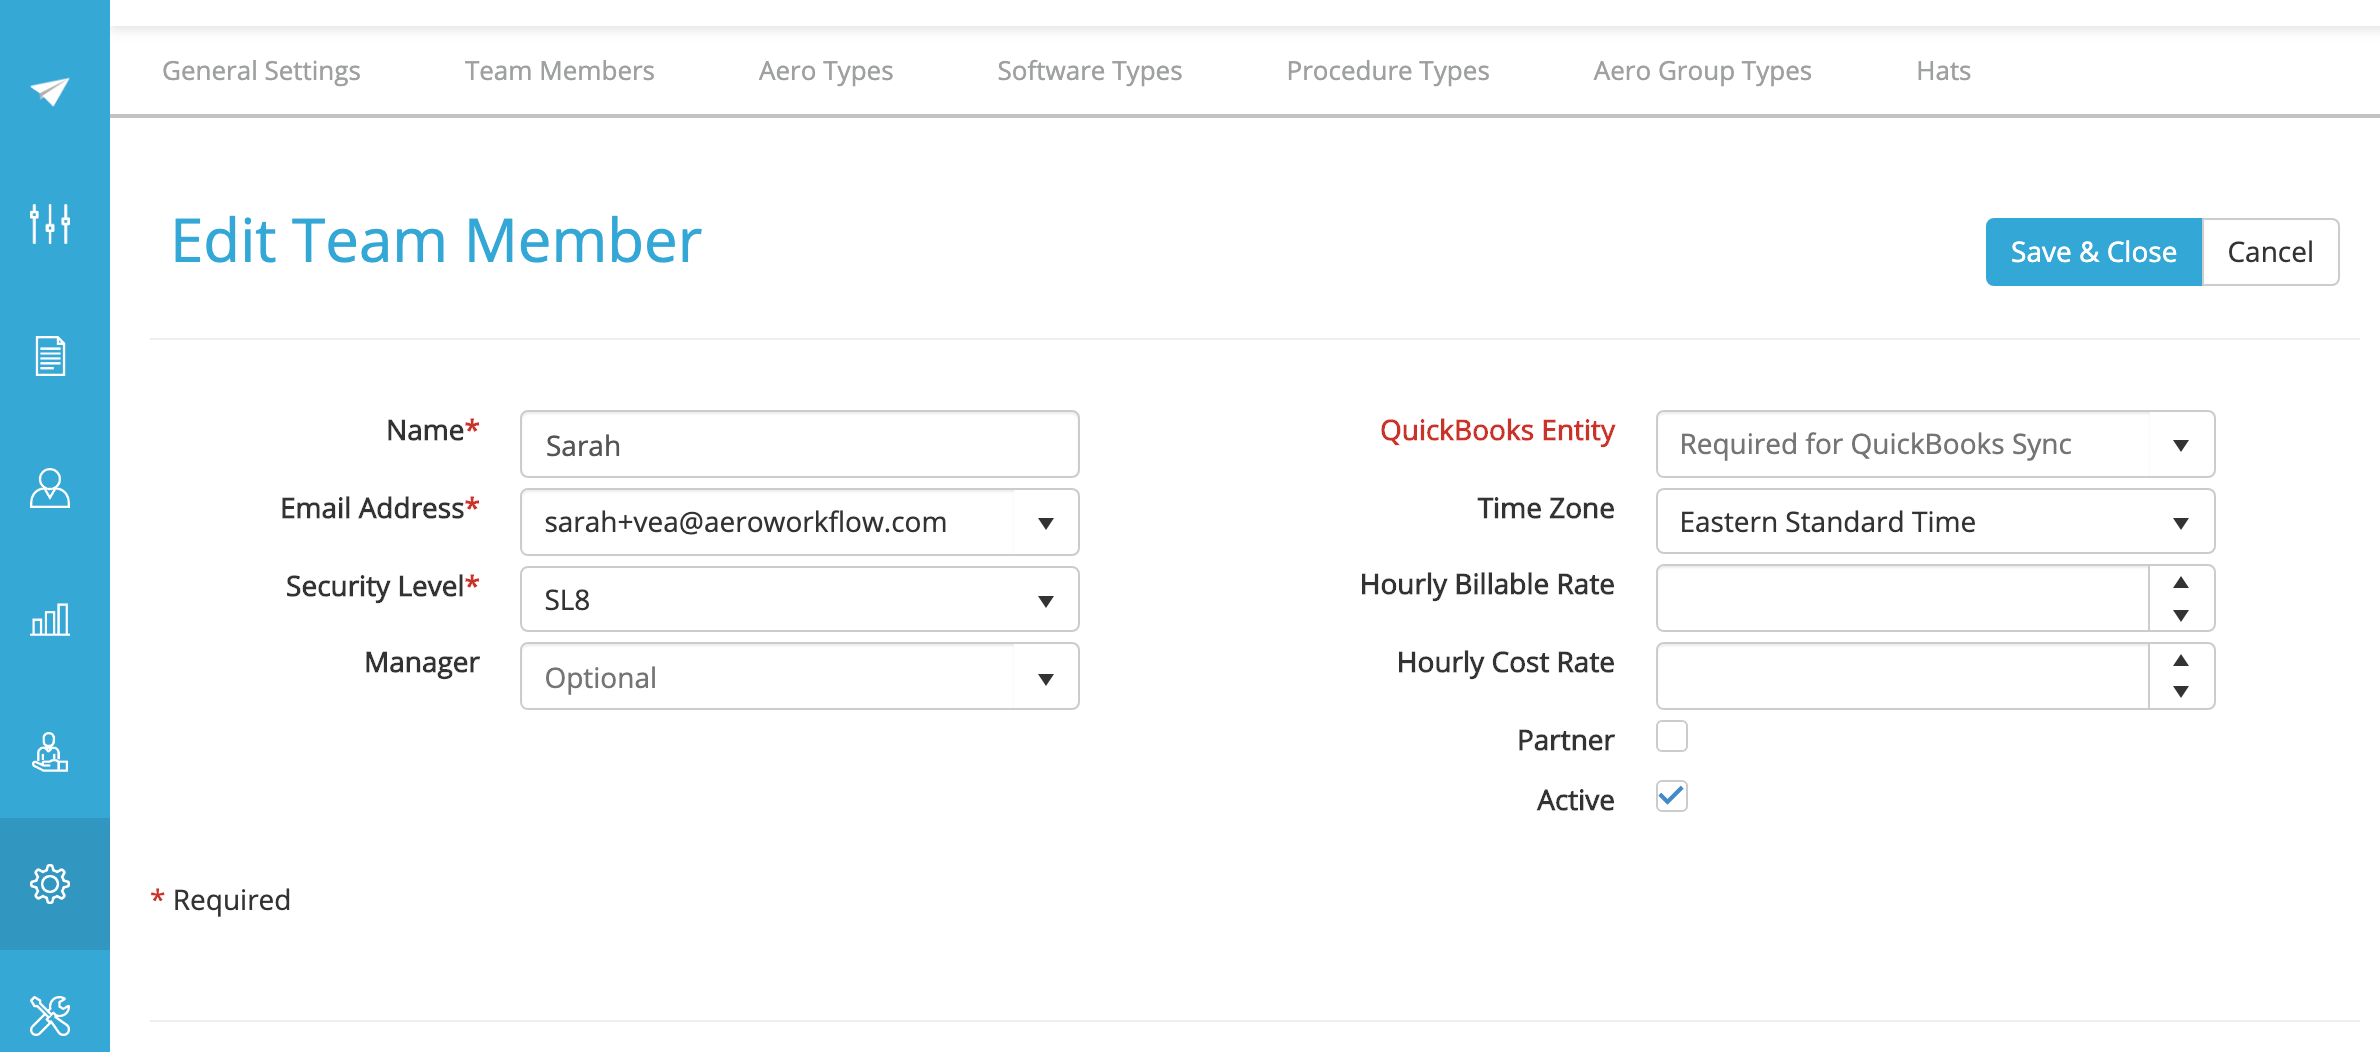
Fields on the Edit Team Member screen

- Name *Required - This is the name that will be listed on the Assigned To dropdown when you are creating a new Aero.
- Email Address *Required - The email address will be their username.
- Security Level *Required - There are 8 different security levels in Aero. To figure out which security level you want to use see how to choose a security level.
- Manager - You can pick the manager here. The dropdown lists other team members that have been added to Aero.
- QuickBooks Entity or TSheets Entity - *Required for QBO or TSheets sync. If you are syncing to QuickBooks Online or TSheets, you must choose the team member's corresponding Entity from the dropdown menu.
- Time Zone - Choose the team member’s time zone.
- Hourly Billable Rate - You can designate a default Hourly Billable Rate for the team member. If you choose Team Member in the Billing Rate Option in Aero Settings > General Settings customers will be billed based on the rate you set here. You can type in a rate or choose one using the up and down arrows.
- Hourly Cost Rate - You can enter a weighted or unweighted hourly cost for the team member. This rate does not sync to QBO, but it is used in many Aero Reports to calculate cost and margin.
- Partner -Checking this box will designate the team member as a firm partner. This information is used for calculating KPI’s
- Active - An inactive Team Member will no longer be able to log into Aero, will not appear in any of the Assigned To drop-down menus, and will not count towards your number of users in your subscription.
Comments
0 comments
Please sign in to leave a comment.